Course Orientation (in Pictures) & the List of Tasks You Do for Points in Getting Started
If there are other things that you need pictures about, just email me.
How to
Login and Succeed at this Course - Also sent by email before the Course opens.
Caution: Please Do Not Come Into the
Course This Way
What’s
on Lesson Modules? (Everything you need in one spot.)
What’s
in a Unit? (All Units have the same things in the same order.)
How
Do You Know What to Do Where and When?.
What’s
All This Stuff about Self-Tests and Full-Tests: How Do They Look?
What’s
All This Stuff about Self-Tests and Full-Tests: How Do They Work to Help You?
Tasks
You Do During Getting Started
How to Login and Succeed at this Course - Also sent by email before the Course opens.
1. Go to https://wcjc.blackboard.com
2.
You see a Login Here section
on the left.
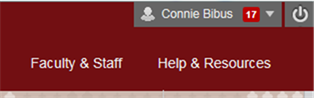
Before you login, notice the upper
right section of the screen with the link Help
& Resources. You will use that link to make sure your computer and browser work with this Blackboard.
FYI: I care about you all, but I am not a techy. WCJC’s IT can help (at Help & Resources). My 1 tech tip is—if your browser is not working or displaying what I say is there—try a different browser for a day.
3.
Follow the directions in the Login Here section for what you type in those 2 fields.
4. Login on the Blackboard log in screen.
5.
On the left side of the new screen see the words
My Courses.
6.
Look for our course and click on it.
Tip: the naming
conventions for Blackboard courses have changed so you may have trouble
guessing our course.
· If you are taking US History I, look for the letters WWW 18 in the name
·
If you are taking US History II, look for the
letters WWW 28 in the name
7. What you see when you click on the course varies with when you log in.
· If you log in in during Getting Started, Blackboard automatically displays Read Me First and the Getting Started Learning Module.
·
If you log in after Getting Started has ended, Blackboard displays the Home Page
and a list of Announcements.
Caution: You need to click on
Learning Modules and then Getting Started and do the tasks there. Also, if you
did not or cannot finish the Getting Started work before the date in the List
of Due Dates, email your instructor in Course Messages (Blackboard’s email) for
what to do.
8. When you are ready to start history work, click on Learning Modules on the Course Menu and then Unit 1.
Caution: Please Do Not Come Into the Course This Way
The Director of Distance Education at WCJC encourages students never to use what is called Blackboard’s Global Navigation.
The students that I have seen fail horribly used this tool in the upper right area next to the
log out button.
|
|
Do NOT use this ↓ |
|
|
|
A
few examples of disasters from this
way to come in the course:
- Students thought they were failing
because they clicked on something they thought was My Grades.
- Other students seem to think that
they can click and go. They skip the instructions so they frequently fail
and sometimes do work they did not need to do.
- Blackboard does not record that you are in the
class so—as far as your instructor knows—you are not in the course.
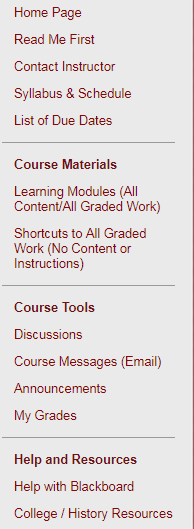
What’s on the Course Menu
|
|
< When you come in the course, what you see 1st after Getting Started <When you come in the course, what you see 1st during Getting Started |
|
< Office hours, contact information – Ask! I am glad to help you. |
|
|
< Use as a reference that is searchable using Ctrl-F (Ctrl with the F key) |
|
|
<The only way to know when to prepare and what’s due and when |
|
|
<Two methods to locate
Course Materials (work you do in the course): · Learning Modules (Blackboard’s word)–Safer method—Provides everything you need: from study guides, instructions, lessons, to primaries—including all of the Blackboard tools you use from assignments to quizzes to discussions to exams ·
Shortcut to All
Graded Work–Provides only Blackboard tools to submit work |
|
|
<Blackboard tools that we
use in this course |
|
|
<Blackboard’s tool for public communication or public submission of writing by students. |
|
|
< Blackboard’s tool for personal communication, such as feedback on your writing. |
|
|
< Blackboard’s tool for public news. |
|
|
< Blackboard’s tool for
your personal view of your grades
in the Gradebook. |
|
|
<Additional information ·
Videos from Blackboard to help you with
Blackboard’s tools ·
College links, such as to Disability Services. ·
History links, such as an introduction to the discipline
of history, a searchable and sorted US Constitution, Merriam-Webster Online Dictionary, and to a map website |
|
|
|
|
|
|
|
|
|
|
|
|
|
|
|
|
|
|
|
|
|
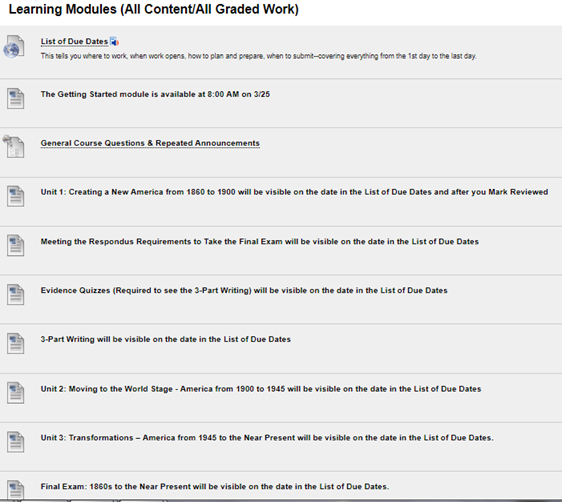
What’s on Lesson Modules? (Everything you need in one spot.)
The Learning Modules page not only gives you access to whatever is listed in the List of Due Dates, but gives you reminders of what we will be available on the date in the List of Due Dates.
For example, this screen was made before the course opened. At 8:00 AM, that first item will be gone and you will see the actual Getting Started module. The word everything on the right side of the page means instructions, all content, all tools, and a discussion so you can ask (and answer) questions to get help and to get points.
|
|
|
|
< Another location for the List of Due Dates |
|
|
< Everything for Getting Started |
|
|
< Another location for the General Discussion |
|
|
< Everything for Unit 1 |
|
|
< Everything to meet the Respondus requirement |
|
|
< Everything to learn about Evidence rules requirement < Everything for the 3-Part Writing from content to the Discussion tool < Everything for Unit 2 < Everything for Unit 3 <Everything for the Final Exam |
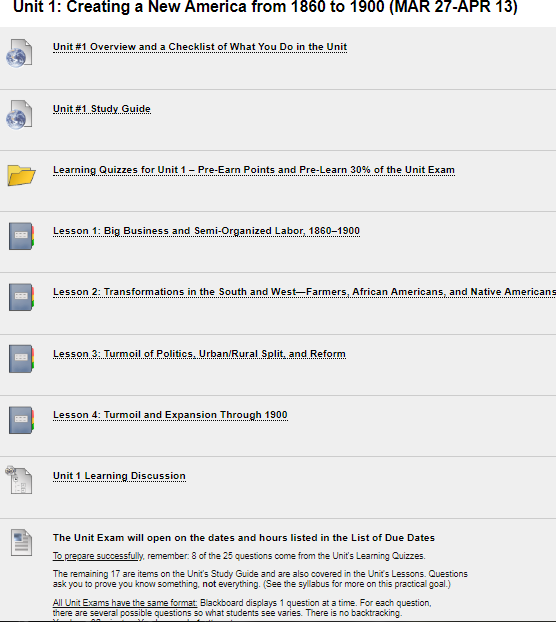
What’s in a Unit? (All Units have the same things in the same order.)
All Units are organized in exactly the same way.
|
|
< A reminder of what happens in the Unit |
|
< The Study Guide for the Unit (and guide to 17 of 25 exam questions) |
|
|
< Learning Quizzes for the Unit (and source of 8 of 25 exam questions) |
|
|
< Usually 3 to 4 Lessons in each Unit to help you see the patterns of history not just for a good grade but as a life-time understanding |
|
|
|
|
|
|
|
|
< Learning Discussion for the Unit |
|
|
< Reminder of where the exam will be and tips |
|
|
|
|
|
|
|
How Do You Know What to Do Where and When?
|
|
|
|
|
|
|
< Use the List of Due Dates for when and where to work |
|
|
|
|
|
|
|
|
|
|
|
|
|
|
|
|
|
|
|
|
|
|
|
|
|
|
|
|
|
|
|
|
|
|
|
|
|
|
|
|
|
|
|
|
|
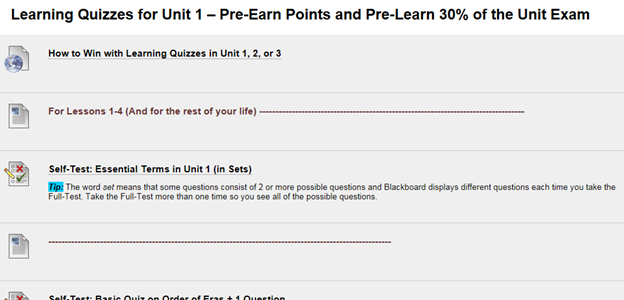
What’s All This Stuff about Self-Tests and Full-Tests: How Do They Look?
This shows an example from United States History I, but it is also applicable to United States History II>
Notice Blackboard Before You Take the Self-Test on Essential Terms
Units begin with a quiz on common concepts in history that freshman students commonly do not know.
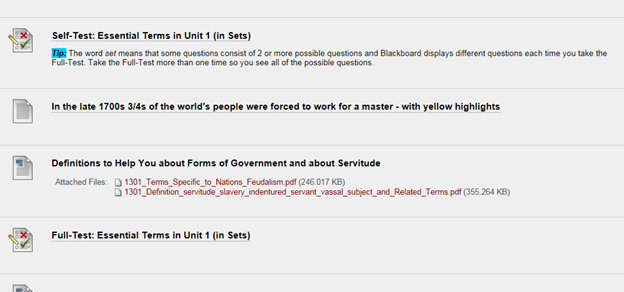
Notice Blackboard After You Take the Self-Test on Essential Terms
Notice the Self-Test is still there—and you cannot retake it, but you can still look at and you should. Why? You need to know what you know and what you have to learn.
Notice there is additional material to help you teach yourself and below that the Full-Test you can retake as many times as you want—with the highest score counting.
What’s All This Stuff about Self-Tests and Full-Tests: How Do They Work to Help You?
One of my favorite thinkers about learning says that what make the difference for learners is their knowing what they know and do not know. This course tries to make it possible for you to learn what you do not know without cost to you in your grade. Here’s what the syllabus says about how they work to help you.
Method of Using Quizzes to Help
Students with Varied Backgrounds:
Whether Learning Quizzes on concepts or map locations (200 points) or the Evidence Quizzes for history (40 points), quizzes always consist of:
·
A self-test so you find out what you know and
you do not know. The name is self-test because you are testing yourself so you know what you need to do.) The goal is
positive so no points are lost.
Self-Tests are extra credit and have questions that are only worth .01. (A .01
is so small that it is equivalent to a penny compared to a dollar.)
Tip: On the other hand, it is in your
interest to answer Self-Tests accurately so measure your own brain accurately
for 2 reasons.
1. You
want to know what you know and do not know to save time and to correct or
complete what you do not know. Caution: With
Evidence Quizzes, this is particularly important because, if you miss many
questions, you must follow instructions carefully because writing about history is different from your prior
experiences.
2. If
you already know the content in the Self-Test and prove that by being correct
on over 80 percent of the questions on that Self-Test, you earn the points for
its Full-Test without taking it.
Your instructor enters those points at the end of each Unit after the Learning Quizzes
close.
· Once you submit the self-test, Blackboard automatically displays additional content (if needed) and a Full-Test so that you can earn full points while teaching yourself the vocabulary and map locations that you do not know. You may repeat as many times as you wish, and your highest score counts.
A Visual to Help You: How a Self-Test and its Full-Test works
|
You take a Self-Test |
|
|
↙ |
↘ |
|
You are right 80% or more of the questions. Notice what you missed. |
You are right 79% or fewer of the questions. Jot down what you missed—not the whole question but brief words. Tip: You can always go back to look at the Self-Test again. |
|
↓ |
↓ |
|
Blackboard
sometimes displays resources, such as dictionary definitions. |
Blackboard sometimes displays resources, such as dictionary definitions. If it does, use Ctrl-F (Find) to search the resources for what you missed. (Ask if you need help.) If Blackboard does not display the Full-Test, you made a 0 on the Self-Test. (Tip: You can confirm that at My Grades.) Email bibusc@wcjc.edu with your name, class, and the exact name of the Self-Test. I will reply back that I deleted the 0 so you can take the Self-Test. |
|
↓ |
↓ |
|
If you want to, you may take the Full-Test. |
You take its Full-Test until you understand. |
|
When
the Unit tests close, |
Your highest score counts. |
|
↓ |
↓ |
|
You
have the Full points |
You
have the Full points |
|
|
|
Tasks You Do During Getting Started
The list of tasks for Getting Started is the same one in the Course Plan that you complete during Getting Started.
|
|
Assignment |
Points |
|
|
Take Syllabus Acknowledgement Quiz. (Caution: You must do it to stay in the course.) |
1 |
|
|
Respond to Before the Class Opens email according to the directions. |
10 |
|
|
Post your Introduction in the Discussion available from Getting Started. |
4 |
|
|
Complete Your Course Plan for Your Grade and submit it in its Blackboard Assignment. Caution: If the total of the assignments and the letter grade you choose do not match, you will have to do this over. You are only as good as your plan. |
15 |
|
|
Complete the Searchable Syllable Assignment and submit it in its Blackboard Assignment. Caution: Be sure you look at the links in that Searchable Syllabus. This is what I would show you if I could sit with you so you could know how to succeed. |
10 |
|
|
Total for this Section of the Course |
40 |